Fury on VMs
This step-by-step tutorial helps you deploy a full Kubernetes Fury Cluster on a set of already existing VMs.
☁️ If you prefer trying Fury in a cloud environment, check out the Fury on EKS tutorial.
The goal of this tutorial is to introduce you to the main concepts of KFD and how to work with its tooling.
Prerequisites
This tutorial assumes some basic familiarity with Kubernetes.
To follow this tutorial, you need:
- kubectl - 1.31.x to interact with the cluster.
- Ansible - used by furyctl to execute the roles from KFD installers
- VMs OS: RHEL 8, RHEL 9, Rocky Linux 8, Rocky Linux 9, Debian 12, Alma Linux 9, Ubuntu 20, or Ubuntu 24
- Valid FQDN for all the VMs, with a valid domain: for example, each VM should have a corresponding DNS entry like
worker1.example.tld,worker2.example.tld,master1.worker.tld, etc. - Static IP address for each VM.
- Two VMs for the load balancer Nodes (at least 1vCPU 1GB RAM each)
- An additional IP that will be used by keepalived to expose the two load balancers in HA, and a DNS record pointed to this IP for the control-plane address.
- Three VMs for the master nodes (at least 2vCPU and 4GB RAM each)
- Three VMs for the worker nodes (at least 4vCPU and 8GB RAM each)
rootor passwordless sudo user SSH access to the VMs
Support for the ARM platform is still in beta status, the Load Balancers managed by furyctl are not currently supported for RHEL and RHEL derivatives running on ARM.
Please use a different OS for the Load Balancers VMs (or disable them and create your own load balancer) to be able to follow the tutorial.
Step 0 - Setup and initialize the environment
-
Open a terminal
-
Clone the fury getting started repository containing all the example code used in this tutorial:
git clone https://github.com/sighupio/fury-getting-started/
cd fury-getting-started/fury-on-vms
Step 1 - Install furyctl
Install furyctl binary following the instructions in furyctl's documentation.
We recommend to always install the latest version available. Latest versions are compatible with previous versions of the distribution. This guide assumes that furyctl version is at least 0.31.0. You can check with the following command:
furyctl version
Step 2 - Initialize the PKI
Kubernetes expects you to configure and use TLS to provide data encryption in transit within the control plane, and between the control plane and its clients. To initialize the Public Key Infrastructure needed to create the TLS certificates for the several components of the cluster, first, we need to initialize the Certificate Authorities for Kubernetes and for the etcd database and then create the certificates for each component. Luckily for us, furyctl can create for you all of this by running the following command:
furyctl create pki
💡 TIP
See the command's help for advanced options:
furyctl create pki --help.
ℹ️ INFO
Learn more on Kubernetes security documentation.
After the initialization of the PKI, you should have a pki folder with the following contents:
pki
├── etcd
│   ├── ca.crt
│   └── ca.key
└── master
    ├── ca.crt
    ├── ca.key
    ├── front-proxy-ca.crt
    ├── front-proxy-ca.key
    ├── sa.key
    └── sa.pub
Step 3 - Decide the strategy for the SSL certificates
We use the HTTPS protocol to expose the KFD ingresses securely. HTTPS relies on certificates that need to be present, there are two approaches to achieve this:
- Provide a self-signed certificate
- Use cert-manager to generate the certificates
Self-signed certificate
If you are using the first approach, you need to have at hand the tls.key, tls.crt, and ca.crt files.
To generate these files using openssl, you can run the following commands:
openssl genrsa -out ca-key.pem 2048
openssl req -x509 -new -days 365 -nodes -key ca-key.pem -out ca.crt -subj "/CN=kube-ca"
openssl genrsa -out tls.key 2048
openssl req -new -key tls.key -out csr.pem -subj "/CN=kube-ca" -config req-dns.cnf
openssl x509 -req -in csr.pem -CA ca.crt -CAkey ca-key.pem -CAcreateserial -out tls.crt -days 365 -extensions v3_req -extfile req-dns.cnf
The file req-dns.cnf is already present the tutorial directory, with the following content:
[req]
req_extensions = v3_req
distinguished_name = req_distinguished_name
[req_distinguished_name]
[ v3_req ]
basicConstraints = CA:FALSE
keyUsage = nonRepudiation, digitalSignature, keyEncipherment
subjectAltName = @alt_names
[alt_names]
DNS.1 = fury.example.tld
DNS.2 = *.fury.example.tld
Change it accordingly to your environment
cert-manager
With cert-manager you can get valid certificates automatically created for you. You can use the http01 challenge to get certificates from Let's Encrypt if your load-balancer is reachable from the Internet, otherwise, we suggest using the dns01 solvers that use an authoritative DNS zone to emit certificates.
KFD includes cert-manager in its core packages and it is fully integrated with the distribution. We will use cert-manager with the dns01 challenge approach in this tutorial.
Step 4 - Write the furyctl.yaml configuration file
The next step is to write the configuration file used by furyctl, in the tutorial directory is present a pre-compiled file that you can use as a starting point.
We will explain in this step, what the important fields are for.
.spec.kubernetes
PKI and access
---
spec:
  kubernetes:
    pkiFolder: ./pki
    ssh:
      username: root
      keyPath: ./ssh-key
This first piece of configuration defines where to find the PKI files (created in step 1), and the SSH connection details for the root user.
keyPath can be a relative or an absolute path.
Common DNS zone and networking
---
spec:
  kubernetes:
    dnsZone: example.tld
    controlPlaneAddress: control-plane.example.tld:6443
    podCidr: 172.16.128.0/17
    svcCidr: 172.16.0.0/17
Next we need to define the DNS zone used by all the nodes and the control-plane address. Also, we need to define the network CIDR for the Pods and network CIDR for the Kubernetes services used in the cluster. These CIDRs must not collide with the IPs of the nodes.
Load Balancers configuration
spec:
  kubernetes:
    loadBalancers:
      enabled: true
      hosts:
        - name: haproxy1
          ip: 192.168.1.177
        - name: haproxy2
          ip: 192.168.1.178
      keepalived:
        enabled: true
        interface: enp0s8
        ip: 192.168.1.179/32
        virtualRouterId: "201"
        passphrase: "b16cf069"
      stats:
        username: admin
        password: password
      additionalConfig: "{file://./haproxy-additional.cfg}"
Next we need to define the load-balancer nodes, each node will have a name and an IP address, additionally, we are also enabling keepalived on an additional floating IP address, in this example 192.168.1.179. Important check which is the main interface that will be used for the keepalived IP, in this example enp0s8.
We need also to give the HAproxy statistics (stats) page a username and a password, and we can also add an additional config to the HAproxy running the load balancers. In the example file we are also balancing the ingress battery using the same load balancers as the control plane address.
Kubernetes Master and Worker nodes
spec:
  kubernetes:
    masters:
      hosts:
        - name: master1
          ip: 192.168.1.181
        - name: master2
          ip: 192.168.1.182
        - name: master3
          ip: 192.168.1.183
    nodes:
      - name: worker
        hosts:
          - name: worker1
            ip: 192.168.1.184
          - name: worker2
            ip: 192.168.1.185
          - name: worker3
            ip: 192.168.1.186
        taints: []
Next we need to define the masters node and the worker nodes. The FQDN that will be used for each node will be the concatenation of the name and the .spec.kubernetes.dnsZone field.
For example, master1 will become master1.example.tld.
Custom registry for Kubernetes core components images
We can override the URL of the registry where to pull images from for the Kubernetes core components (kube-apiserver, kube-controller-manager, kube-scheduler, kube-proxy, coredns). The host is mandatory, while the port is optional. For mirrors of the official registry, append /fury/on-premises at the end (the default value is registry.sighup.io/fury/on-premises).
spec:
  kubernetes:
    advanced:
      registry: <registry-host>[:<registry-port>]
.spec.distribution
Networking core module
spec:
  distribution:
    modules:
      networking:
        type: calico
In this piece of configuration, we are choosing to install calico as CNI in our cluster from the fury-kubernetes-networking core module.
Ingress core module
spec:
  distribution:
    modules:
      ingress:
        baseDomain: fury.example.tld
        nginx:
          type: single
          tls:
            provider: certManager
        certManager:
          clusterIssuer:
            name: letsencrypt-fury
            email: example@sighup.io
            solvers:
              - dns01:
                  route53:
                    region: eu-west-1
                    accessKeyID: AKIAEXAMPLE
                    secretAccessKeySecretRef:
                      name: letsencrypt-production-route53-key
                      key: secret-access-key
In this section, on the configuration of the fury-kubernetes-ingress core module, we are selecting to install a single battery of nginx ingress controller and configuring cert-manager as the provider to emit SSL certificates for our ingresses.
baseDomain is the suffix hostname used on all the ingresses that will be created for the KFD modules, for example, Grafana will become grafana.<baseDomain>.
To correctly configure the cert-manager clusterIssuer we need to put a valid configuration for the dns01 challenge solver. The secret letsencrypt-production-route53-key will be created using furyctl's plugins feature in the next steps.
If instead you want to use a self-signed certificate (or a valid one from a file), you need to configure the ingress module like the following:
spec:
 distribution:
   modules:
     ingress:
       baseDomain: fury.example.tld
       nginx:
         type: single
         tls:
           provider: secret
           secret:
             cert: "{file://./tls.crt}"
             key: "{file://./tls.key}"
             ca: "{file://./ca.crt}"
       certManager:
         clusterIssuer:
           name: letsencrypt-fury
           email: example@sighup.io
           type: http01
Logging core module
spec:
  distribution:
    modules:
      logging:
        type: loki
        loki:
          tsdbStartDate: "2024-12-03"
        minio:
          storageSize: "20Gi"
This section configures the fury-kubernetes-logging module. In this example we are installing Loki as log storage, and configuring the Logging operator with all the Flows and Outputs to send logs to the Loki stack.
The minio configuration is the S3 bucket used by Loki to store logs, the storageSize selected defines the size for each minio disk, in total 6 disks split in 2 per 3 minio replicas.
Monitoring core module
spec:
  distribution:
    modules:
      monitoring:
        type: prometheus
This section configures the fury-kubernetes-monitoring module. The complete stack with Prometheus.
Policy (OPA) core module and Tracing core module
spec:
  distribution:
    modules:
      policy:
        type: none
      tracing:
        type: none
For simplicity, we are not installing a policy system (Gatekeeper or Kyverno) and a tracing solution (Tempo) in the cluster.
DR core module
spec:
  distribution:
    modules:
      dr:
        type: on-premises
        velero: {}
We are also configuring Velero for the cluster backups from the fury-kubernetes-dr module. Velero will be deployed with a minio instance used to store all the backups.
Auth core module
spec:
  distribution:
    modules:
      auth:
        provider:
          type: none
This section configures the authentication for the ingresses and also the authentication via OIDC on the APIServer, for simplicity we are disabling the authentication on the ingresses and not configuring the OIDC authentication for the APIserver.
Custom registry for distribution phase
We can override the URL of the registry where to pull images from for the KFD core modules. The host is mandatory, while the port is optional. For mirrors of the official registry, append /fury at the end (the default value is registry.sighup.io/fury).
spec:
  distribution:
    common:
      registry: <registry-host>[:<registry-port>]
NOTE: If plugins are pulling from the default registry, the registry will be replaced for the plugins phase too.
.spec.plugins
spec:
  plugins:
    kustomize:
      - name: cert-manager-secret
        folder: ./cert-manager-secret/
      - name: storage
        folder: https://github.com/rancher/local-path-provisioner/deploy?ref=v0.0.24
This section configures additional plugins to be installed in the cluster. There can be two types of plugin, helm and kustomize, in this example we are installing two Kustomize projects.
The first one, under the cert-manager-secret folder, installs the secret used by cert-manager to interact with the route53 zone for the dns01 challenge. Change the example values in the ./cert-manager-secret folder with the correct credentials to interact with your route53 zone.
The second one, storage, installs the local-path-provisioner that provides a simple dynamic storage for the cluster (not production grade).
Step 5 - Launch the installation with furyctl
Now that everything is configured you can proceed with the installation using the furyctl CLI.
Simply execute:
furyctl apply --outdir $PWD
⏱ The process will take some minutes to complete, you can follow the progress in detail by running the following command:
tail -f .furyctl/furyctl.<timestamp>-<random-id>.log | jq
--outdirflag is used to define in which directory to create the hidden.furyctlfolder that contains all the required files to install the cluster. If not provided, a.furyctlfolder will be created in the user's home directory.
The output should be similar to the following:
INFO Downloading distribution...
INFO Validating configuration file...
INFO Downloading dependencies...
INFO Validating dependencies...
INFO Running preflight checks
INFO Preflight checks completed successfully
INFO Running preupgrade phase...
INFO Preupgrade phase completed successfully
INFO Creating Kubernetes Fury cluster...
INFO Checking that the hosts are reachable...
INFO Running ansible playbook...
INFO Kubernetes cluster created successfully
INFO Installing Kubernetes Fury Distribution...
INFO Checking that the cluster is reachable...
INFO Checking storage classes...
WARN No storage classes found in the cluster. logging module (if enabled), tracing module (if enabled), dr module (if enabled) and prometheus-operated package installation will be skipped. You need to install a StorageClass and re-run furyctl to install the missing components.
INFO Applying manifests...
INFO Kubernetes Fury Distribution installed successfully
INFO Applying plugins...
INFO Plugins installed successfully
INFO Saving furyctl configuration file in the cluster...
INFO Saving distribution configuration file in the cluster...
🚀 Success! The first deployment step is complete. Run furyctl again to install all the components that needs a working storageClass now, since we installed one using plugins function.
furyctl create cluster --outdir $PWD --skip-deps-download
To speed up the following executions, you can use
--skip-deps-download. This works only if the.furyctlfolder has been already initialized.
INFO Downloading distribution...
INFO Validating configuration file...
INFO Validating dependencies...
INFO Running preflight checks
INFO Checking that the cluster is reachable...
INFO Preflight checks completed successfully
INFO Running preupgrade phase...
INFO Preupgrade phase completed successfully
INFO Creating Kubernetes Fury cluster...
INFO Checking that the hosts are reachable...
INFO Running ansible playbook...
INFO Kubernetes cluster created successfully
INFO Installing Kubernetes Fury Distribution...
INFO Checking that the cluster is reachable...
INFO Checking storage classes...
INFO Applying manifests...
INFO Kubernetes Fury Distribution installed successfully
INFO Applying plugins...
INFO Plugins installed successfully
INFO Saving furyctl configuration file in the cluster...
INFO Saving distribution configuration file in the cluster...
To interact with the cluster a kubeconfig has been created on the folder, make it usable with kubectl with:
export KUBECONFIG=$PWD/kubeconfig
Step 6 - Explore the distribution
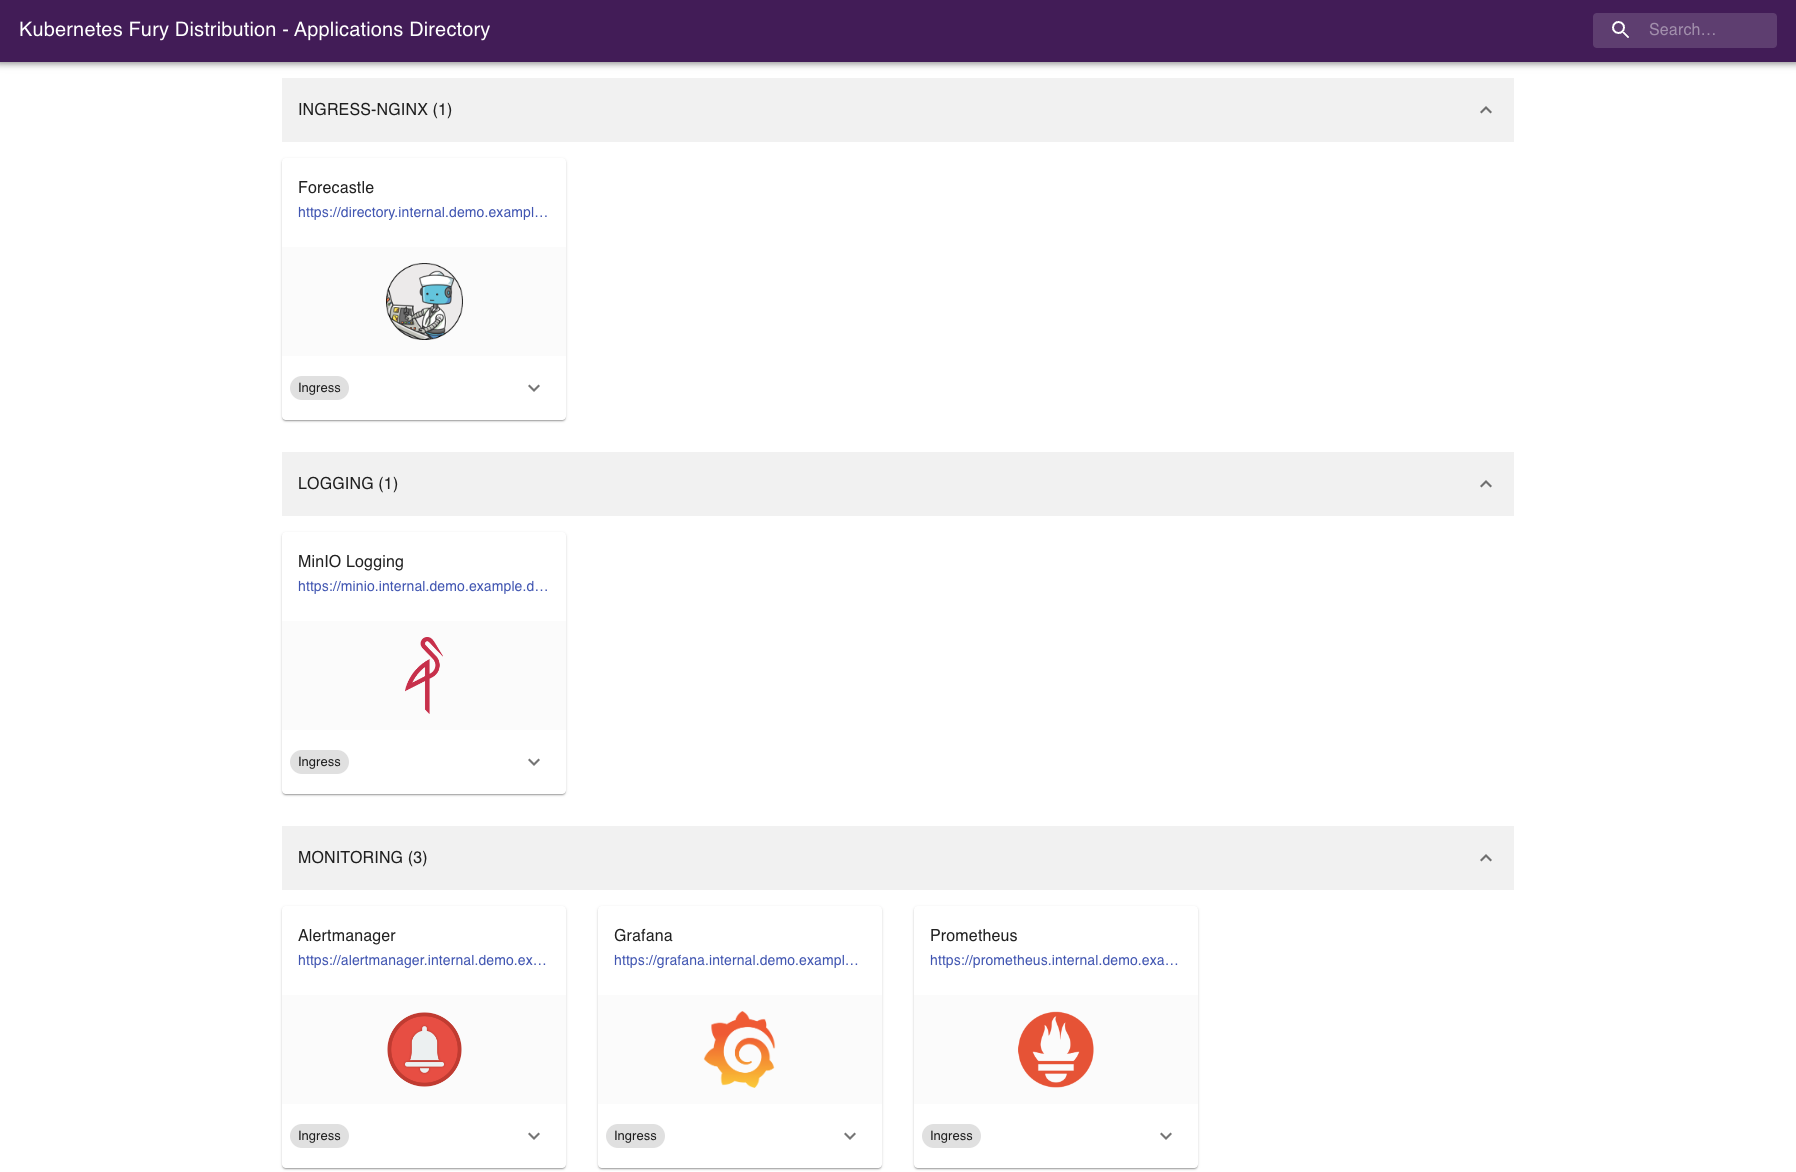
Forecastle
Forecastle is an open-source control panel where you can access all exposed applications running on Kubernetes.
Navigate to https://directory.fury.example.tld to see all the other ingresses deployed, grouped by namespace.
Grafana
Grafana is an open-source platform for monitoring and observability. Grafana allows you to query, visualize, alert, and understand your metrics.
Navigate to https://grafana.fury.example.tld or click the Grafana icon from Forecastle.
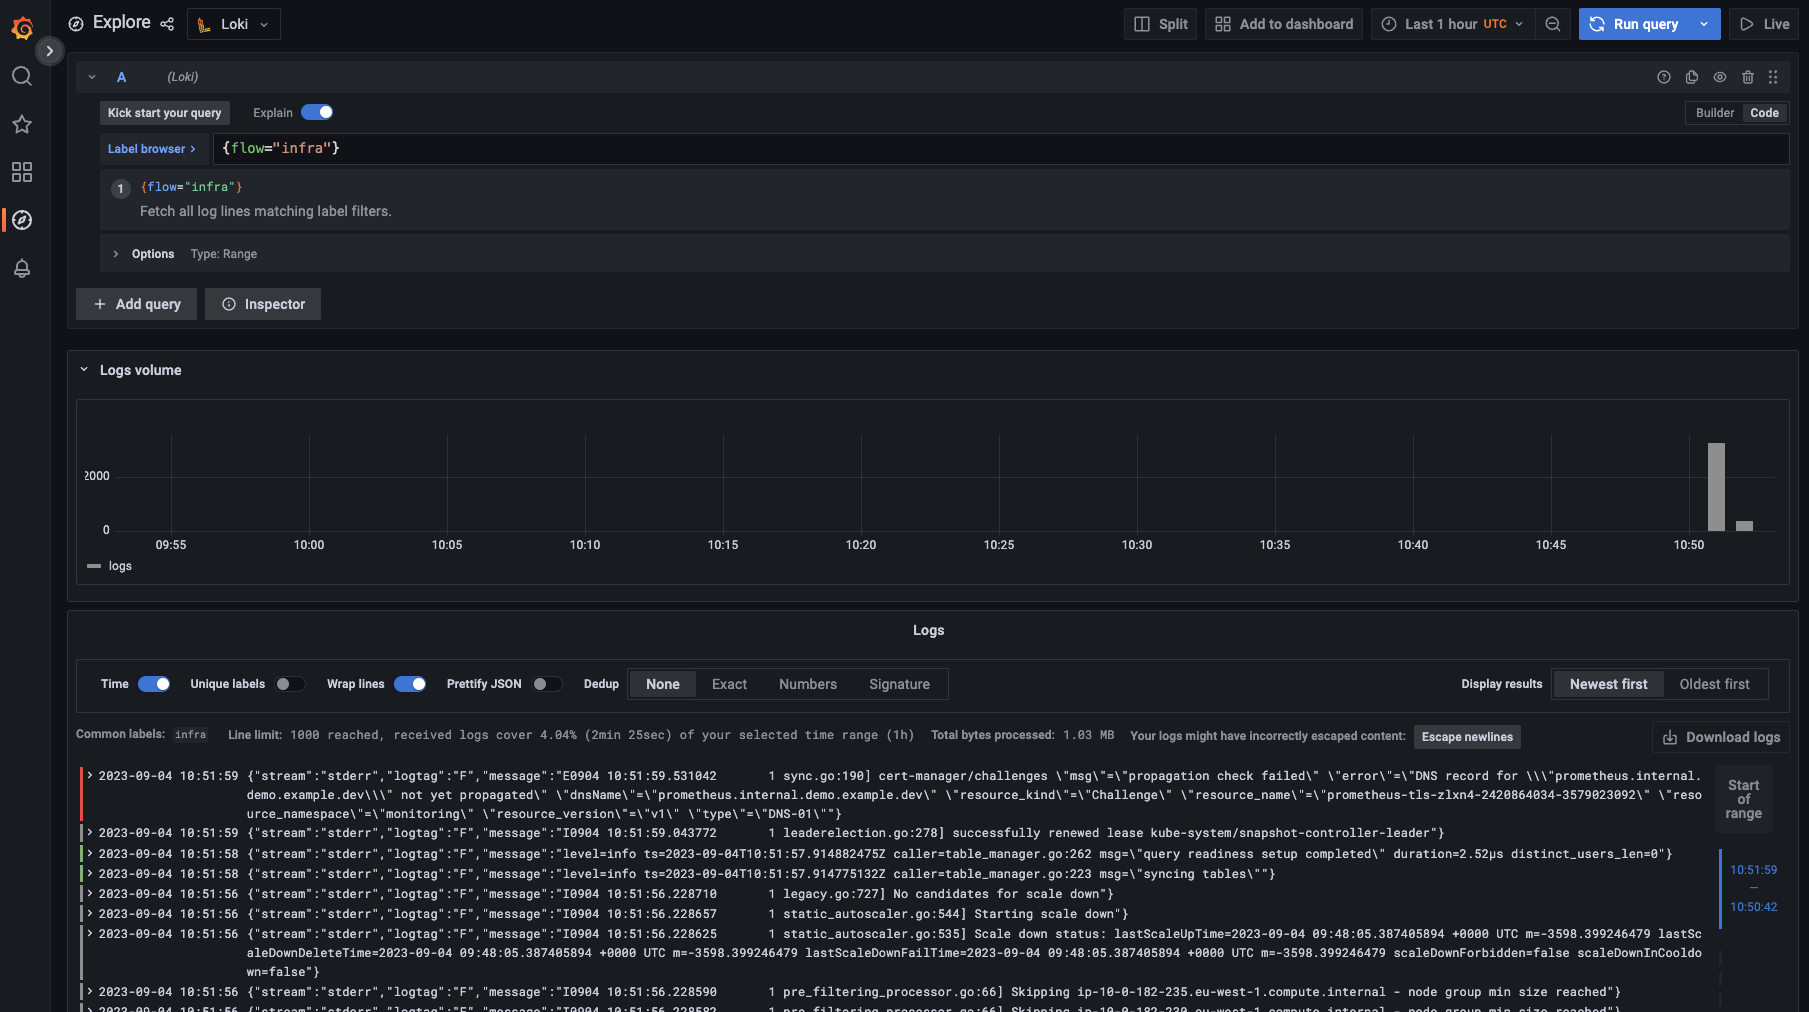
Discover the logs
Navigate to Grafana, and:
- Click on explore
- Select Loki datasource
- Run your query!
This is what you should see:
Discover dashboards
Fury provides some pre-configured dashboards to visualize the state of the cluster. Examine an example dashboard:
- Click on the search icon on the left sidebar.
- Write
podsand click enter. - Select the
Kubernetes/Podsdashboard.
This is what you should see:

Conclusions
Congratulations, you made it! 🥳🥳
We hope you enjoyed this tour of Fury!
Issues/Feedback
In case you ran into any problems feel free to open an issue in GitHub.
Where to go next?
More tutorials: